
Glamping Under the Stars – In Your Own Backyard

I’m not someone others would describe as an avid camper. In fact, I’m not someone others would describe as a camper at all, unless your idea of camping is a 5-star hotel. But, with the warm weather season approaching and the world in lockdown, I was looking for a change of scenery (while still staying home) and a project in which to engage my high energy kids. It sounded like fun to take a luxurious approach to sleeping under the stars. So, of course we transformed our backyard into a glamorous campsite – or glampsite as they’re known – for an unforgettable outdoor family experience.
Although I had no idea what I was getting myself into when I started this adventure (and neither did my husband since I took a ‘take action now, ask forgiveness later’ approach), the end result was amazing! I did a lot of research to make sure our glampsite was designed for our whole family to enjoy, so be sure to check out the resources at the end to help create your own.
Here’s how we did it:
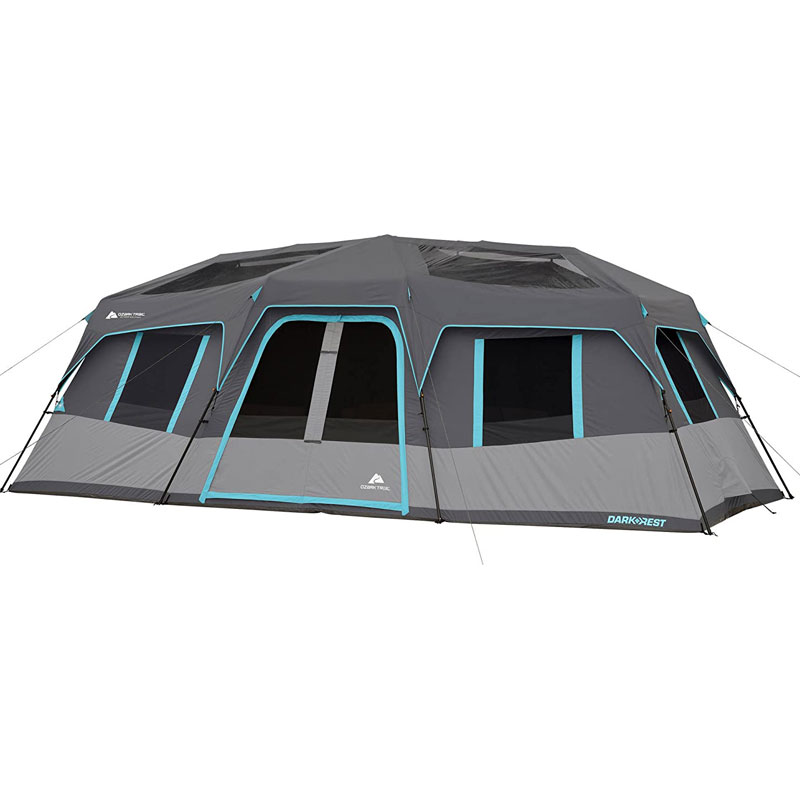
Critical First Step – Choosing the TentThere are many factors that come into play when determining what tent will best suit your needs for backyard glamping – size, style, material (key depending on your climate), number of rooms, dark rest technology, and ease of set up.
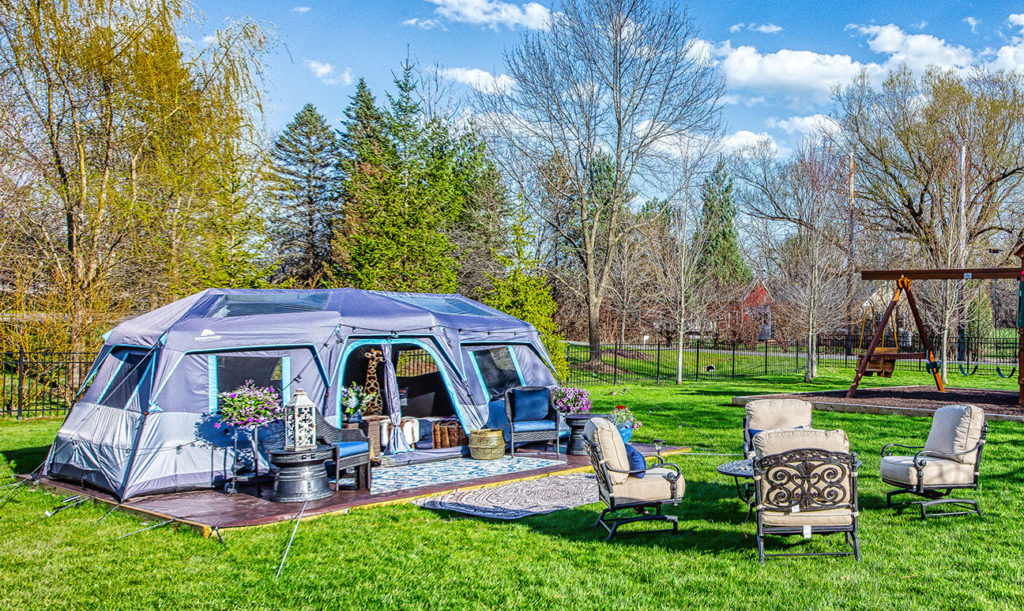
For us, dark rest technology (aka dark room tent) and size were the two main priorities. We have young children, ages 3 and 6, and didn’t want them up with the rising sun (that wouldn’t be relaxing for anyone!), so we limited our search to dark room tents. My husband and I are both tall and we wanted to be able to stand up comfortably, so we chose a cabin-style tent that has high walls.
An important factor to making this enjoyable for everyone was choosing a roomy tent that allowed us to spread out, with the kids and adults each having their own space. Although we’re a family of four, we chose a 12-person tent with three divided rooms. When looking for a tent, keep in mind that the listed occupancy (e.g. sleeps 8), means that many sleeping bags will fit like sardines. If you’re like us and want some breathing room, I highly recommend purchasing one above your actual occupancy.
Another consideration that we should have taken more seriously was the material of the tent and the appropriateness for the climate. We live in Wisconsin, and spring camping is COLD with below freezing temps at night. The tent we chose was clearly not intended for cold weather backyard glamping, which we learned the hard way (more on that later)…
It All Starts with a Steady Base
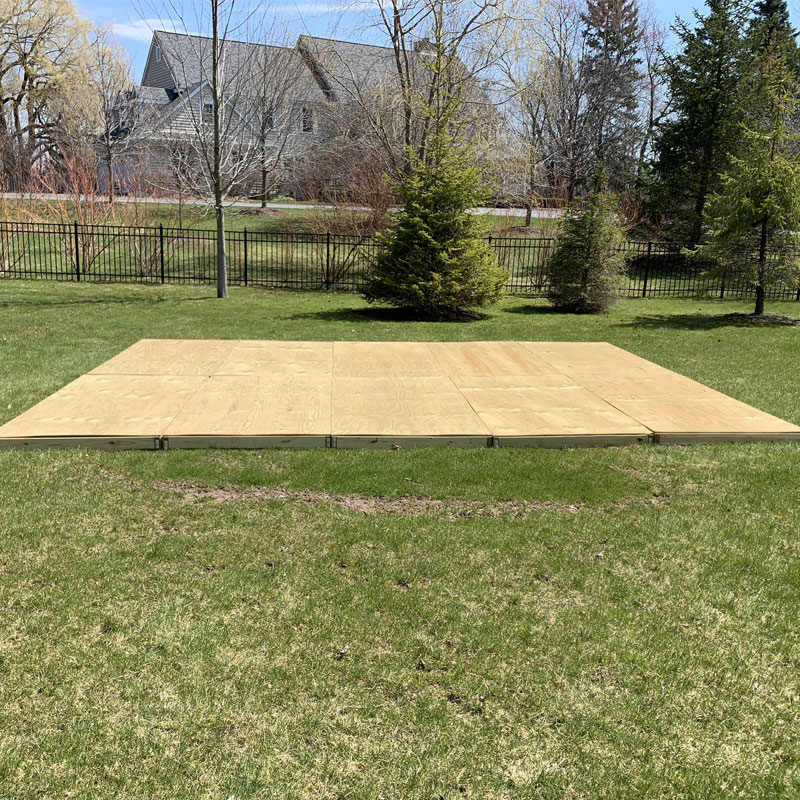
My backyard is neither flat nor dry. While I had originally planned to put the tent directly on the ground, with a tarp beneath to protect against moisture, I quickly realized that it wouldn’t make for a very luxurious camping experience. The solution – a tent platform! I’ve never built a platform before, but for us it was a necessity, so out came my circular saw and electric drill. Personally, I love small construction projects like this , so I was excited about this part! But, even if it’s not your thing, don’t let it scare you – it’s not hard, just a little time consuming. I bribed my husband to help (a little bourbon goes a long way), and with two people it goes pretty quickly. He was very impressed with my carpentry skills, and we even enlisted the kids as apprentices to hand us the tools and paint the shims that we used to level the platform.
Before you begin, determine how large your platform needs to be to accommodate your tent. Our tent is 20×10 feet, but we wanted a small “front porch” for extra seating, so we built a 20-x16-foot platform. There are many ways to construct a platform, but a key consideration is how permanent you intend it to be. We built ours knowing that we wanted it to be portable and easy to disassemble, so we constructed it in 8×4 foot sections, with a simple 2×4 inch skirt.
Before erecting the tent, I recommend laying a tarp over your platform and securing it with bungee cords and stakes to help keep the base dry.
Tent Set Up – Easy as 1, 2, 3
And 4, 5, 6. My eagerness got the better of me, and instead of waiting for the gale-force winds to subside – out we went. After several attempts, we decided our time was better spent cursing the wind and drinking a beer. Once the wind calmed down,the “two-minute tent” took us about two hours. Much of the extra time went into strategizing how to set the tent up on the platform. In addition to the tent stakes, we used nails to secure the tent tabs to the platform and some extra bungee cords for good measure. Other than that, assembly was pretty easy.
Backyard Glamping is All About Comfort
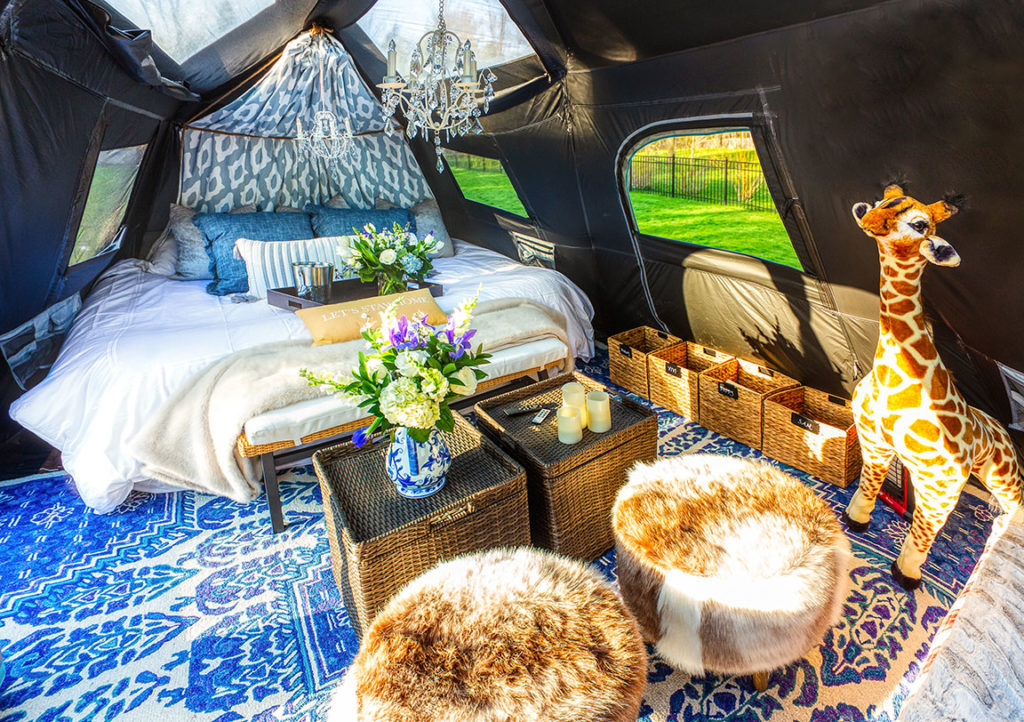
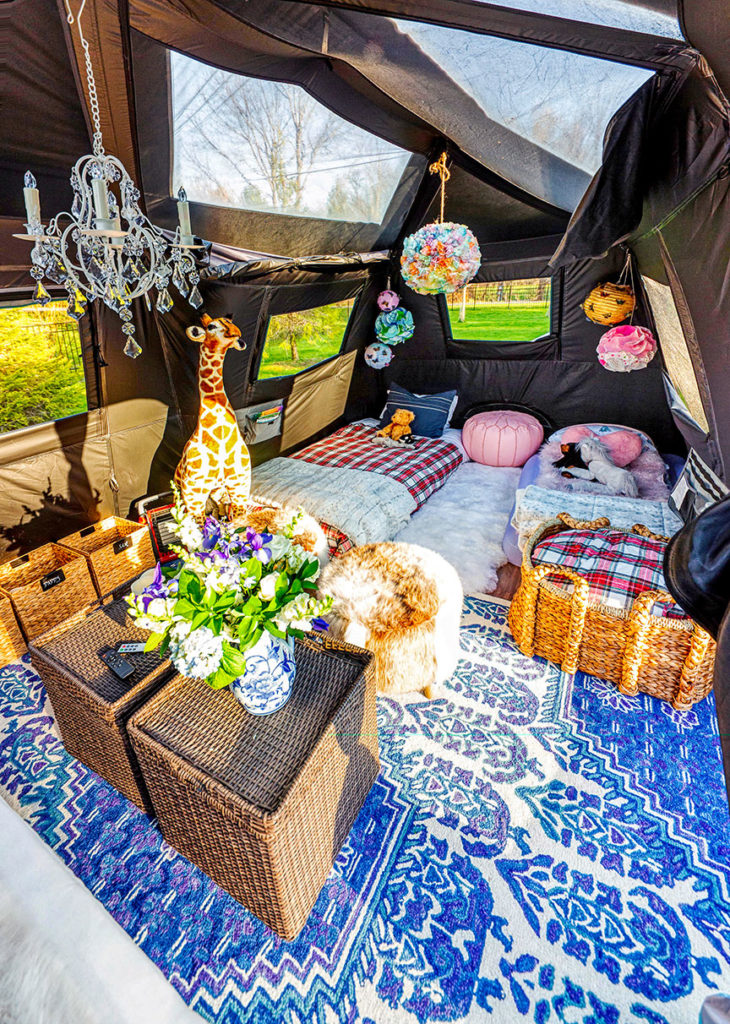
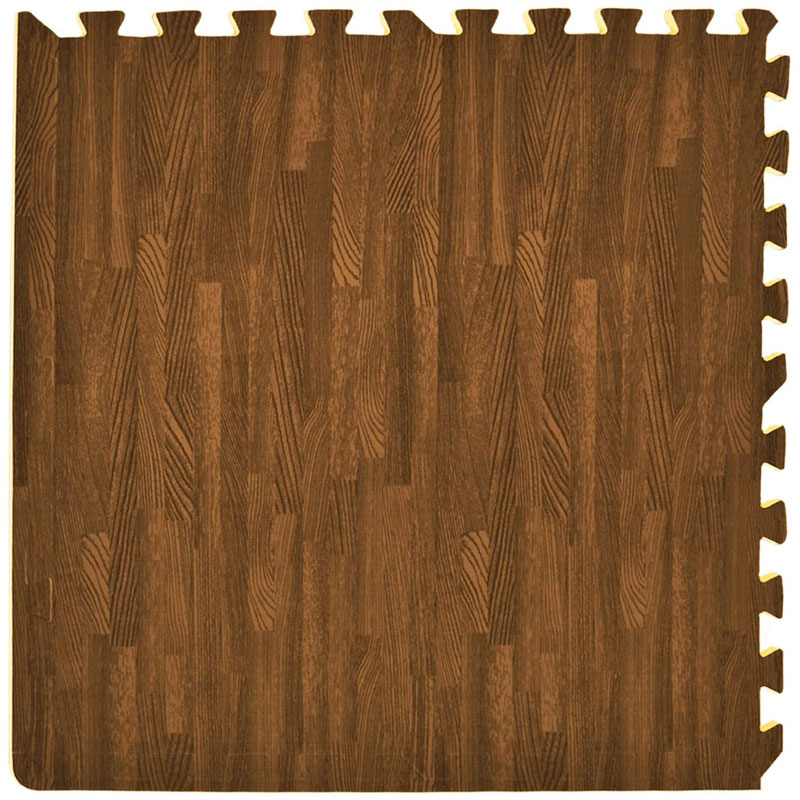
Before moving into our tent, we laid down interlocking foam cushion tiles to soften up the wooden platform. The kids loved putting together the “puzzle” and it was another way to get them involved in the build.
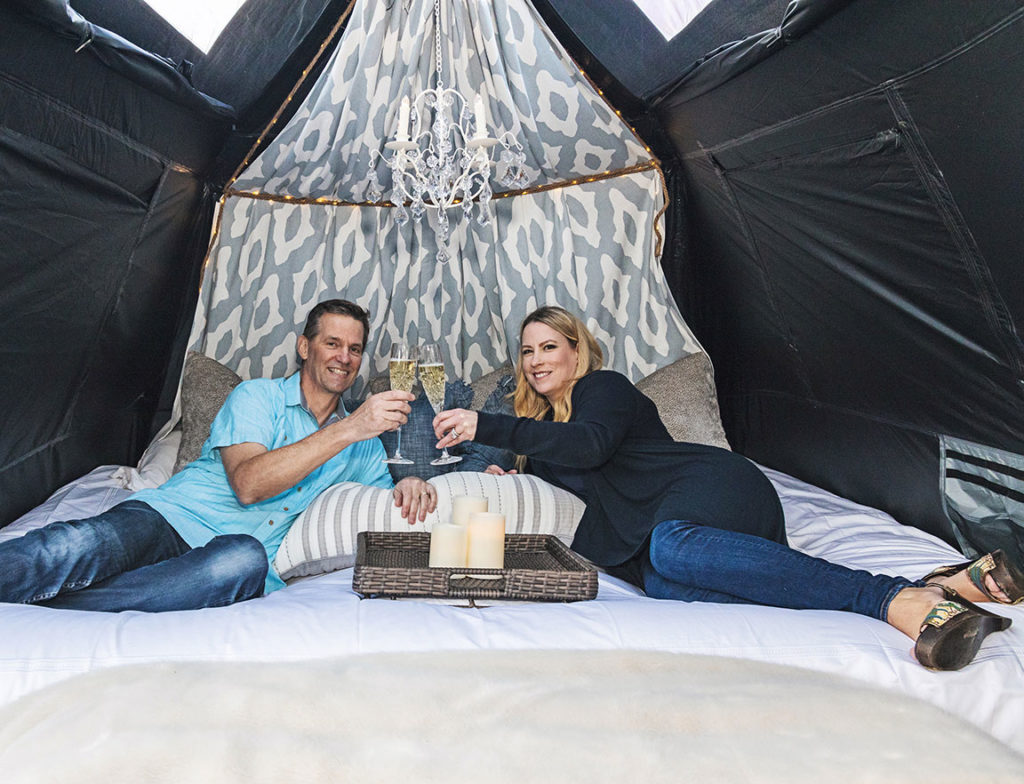
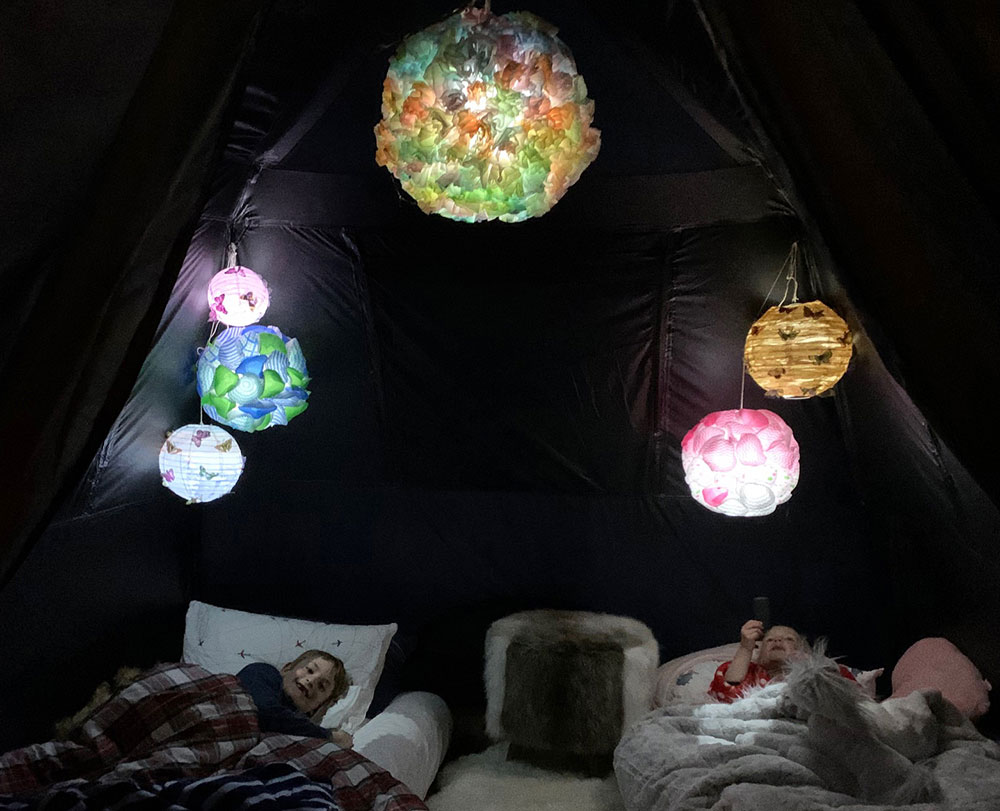
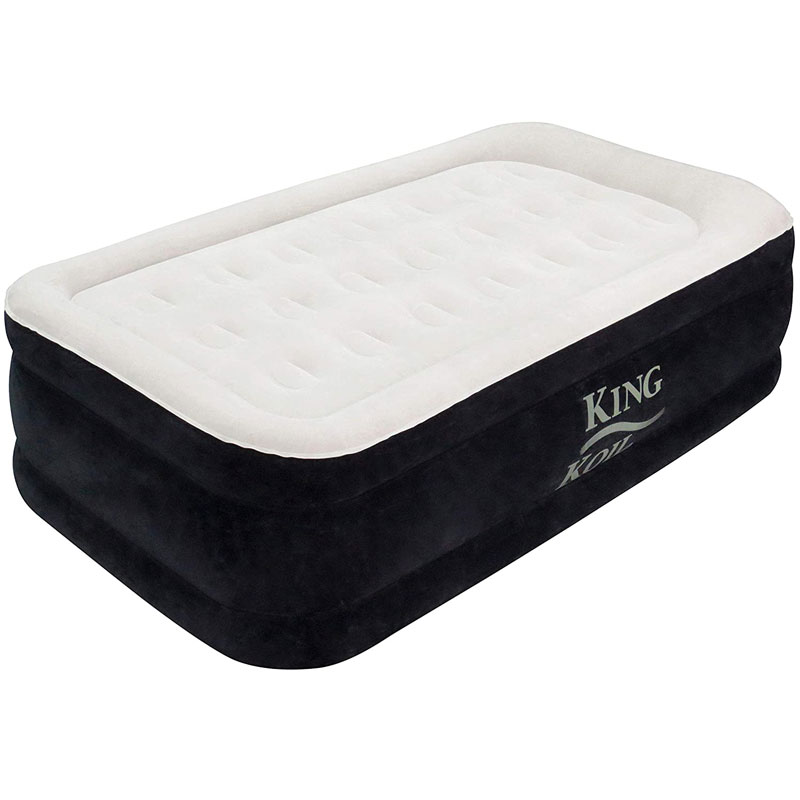
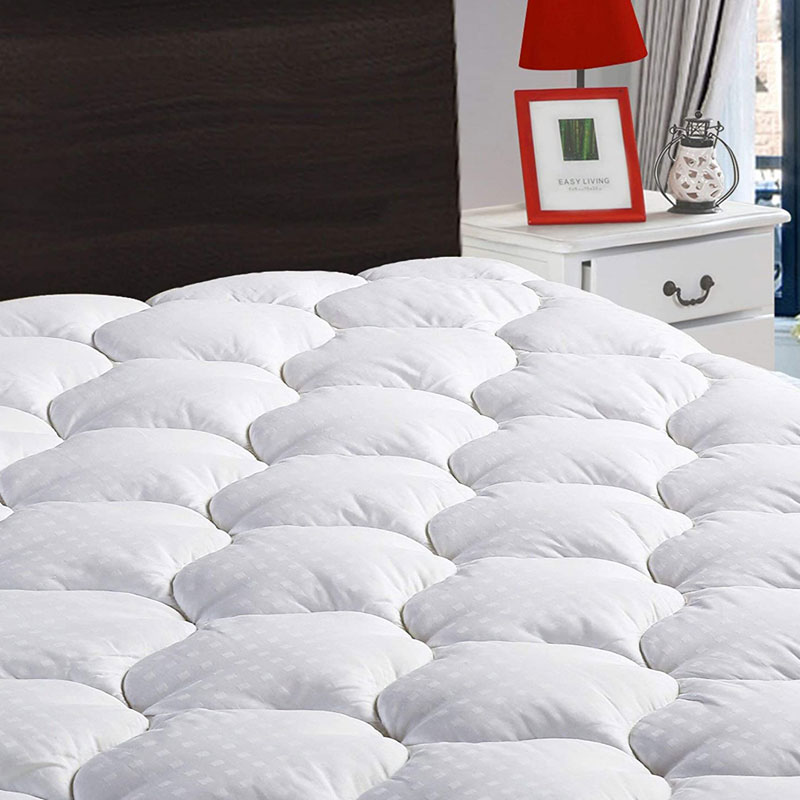
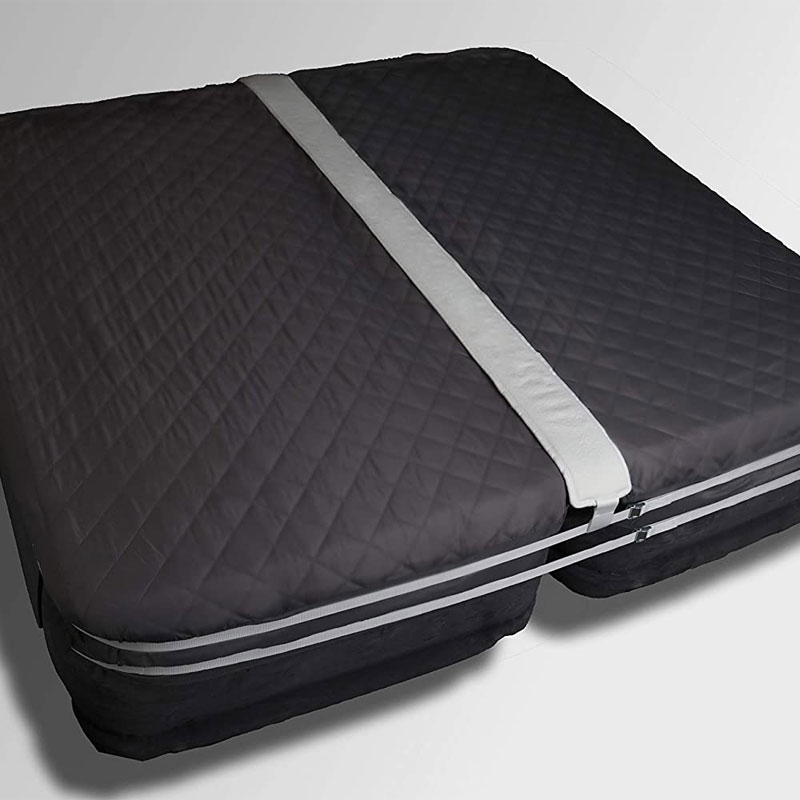
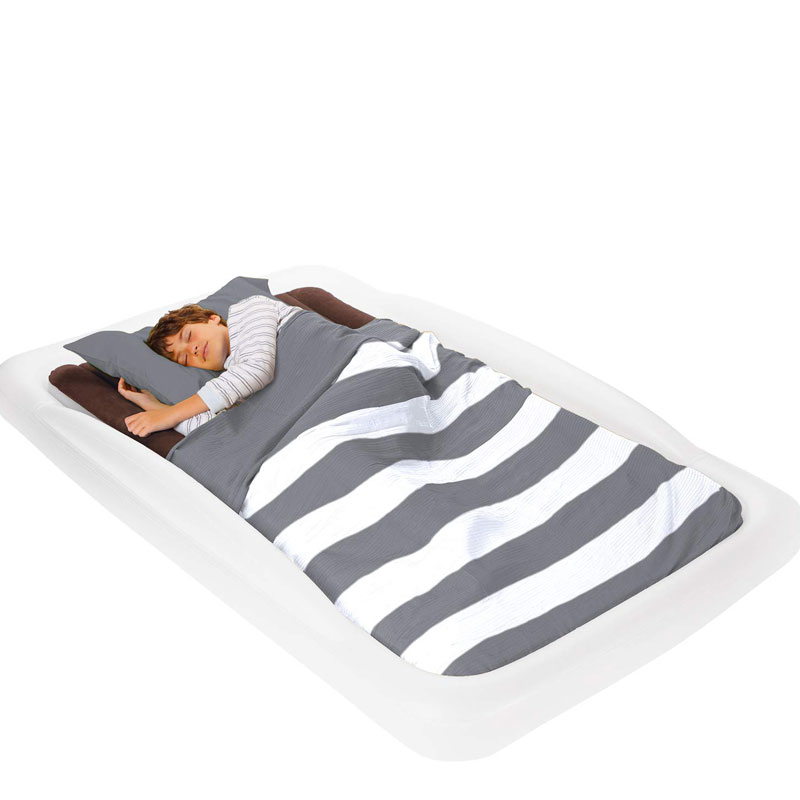
If this was going to work, getting a good night’s sleep was a priority. My husband and I didn’t want to compromise on the “master” bed so we strapped together two twin inflatable mattresses and covered them with a nice, thick king-size mattress pad. For the kids, we love The Shrunks inflatable mattresses that come with built-in bed rails.
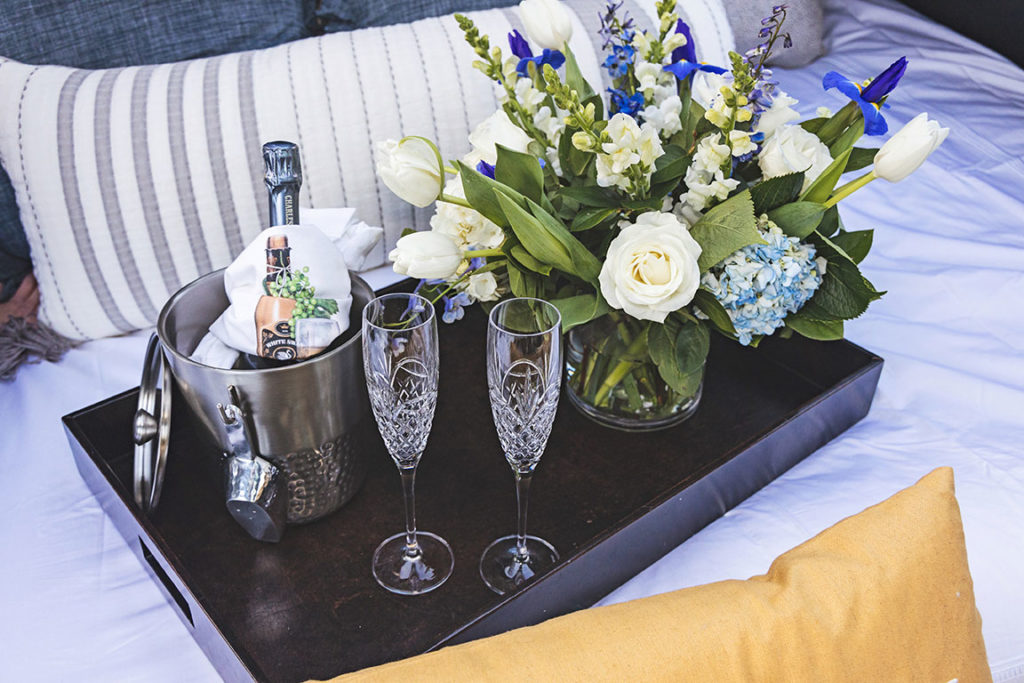
After making everyone’s beds, the kids brought out their favorite stuffed animals and I added an extra faux fur blanket for warmth. I used crisp white linens and decorative throw pillows on the master bed to give it an upscale hotel vibe.
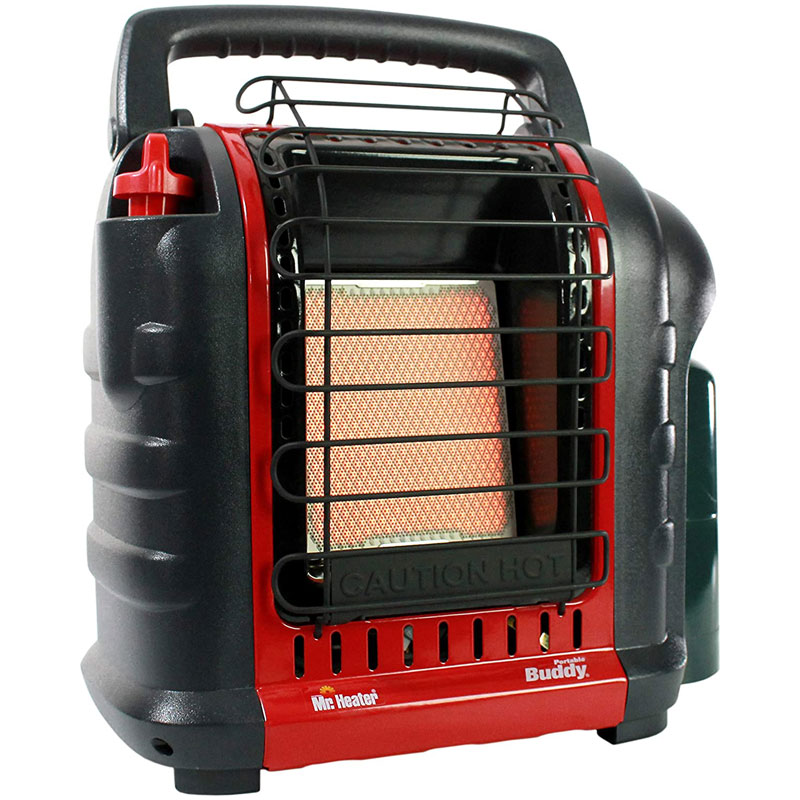
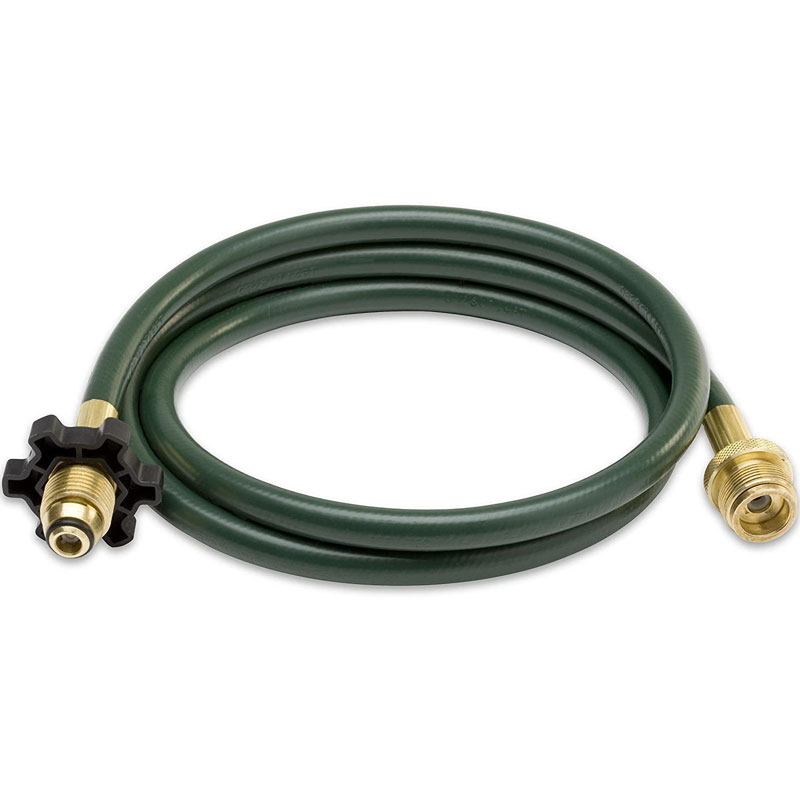
An absolute must for our comfort was a safe heating source to keep warm throughout the night. I did a lot of research on this and we chose the Mr. Heater Portable Buddy, which is a convenient size and accommodates a 1-pound propane tank. It’s been extremely easy to use, but learn from my mistake – the 1-pound tank doesn’t last long (especially in below-freezing weather) so on our first night in the tent, we were getting up every 2-3 hours to replace the tanks (not relaxing or luxurious!) The good news is that it can be connected to a 20-pound tank with a hose assembly. (Be sure to keep the tank outside of the tent.) This has been a much better solution for us. We also took an oath to never again glamp when the temps fall below 40 degrees Fahrenheit.

While my idea of camping has never included chandeliers or duvets, I was willing to give it a shot – as long as good alcohol was involved,”
–Dave, my husband
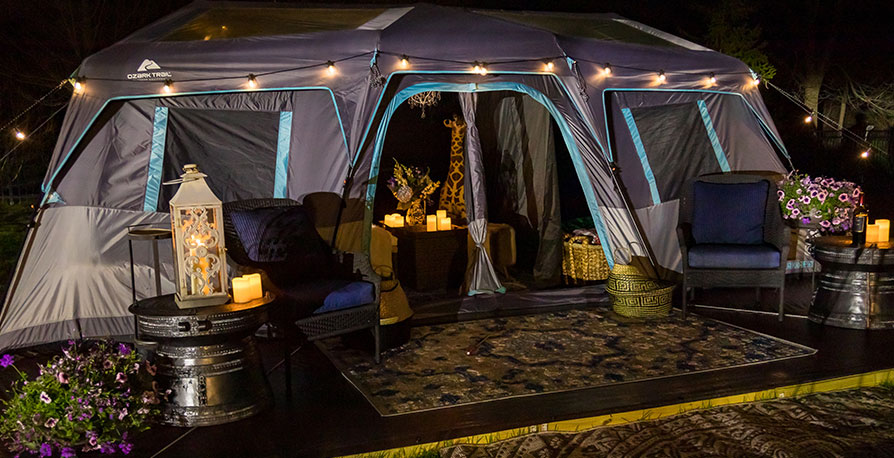
Glamped-Up Décor
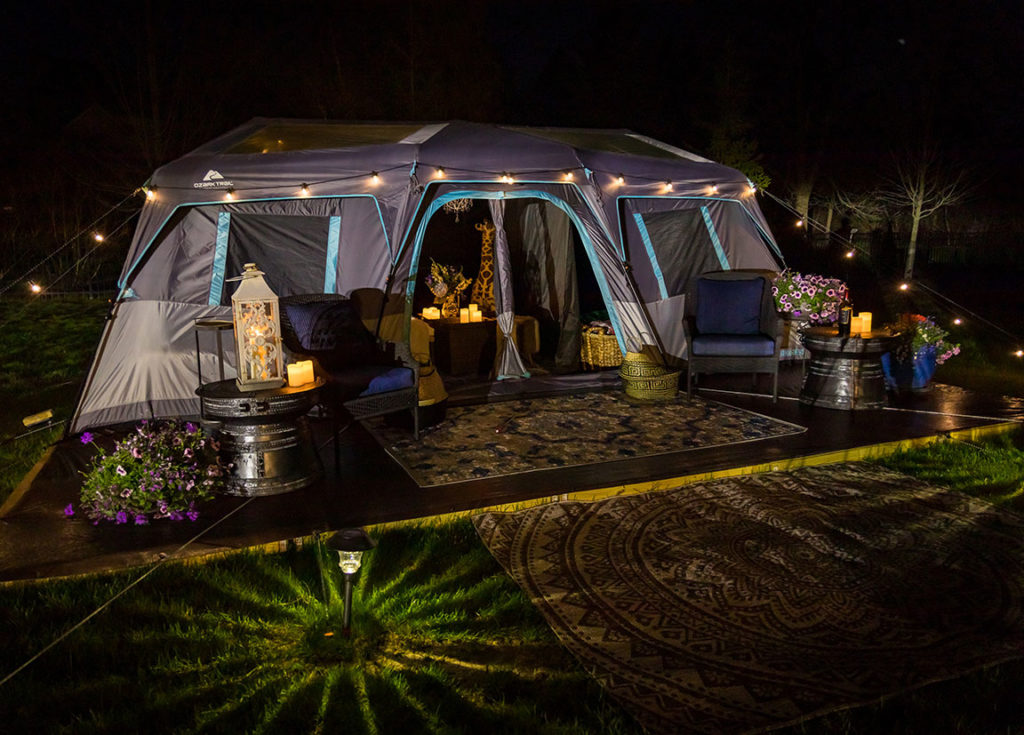
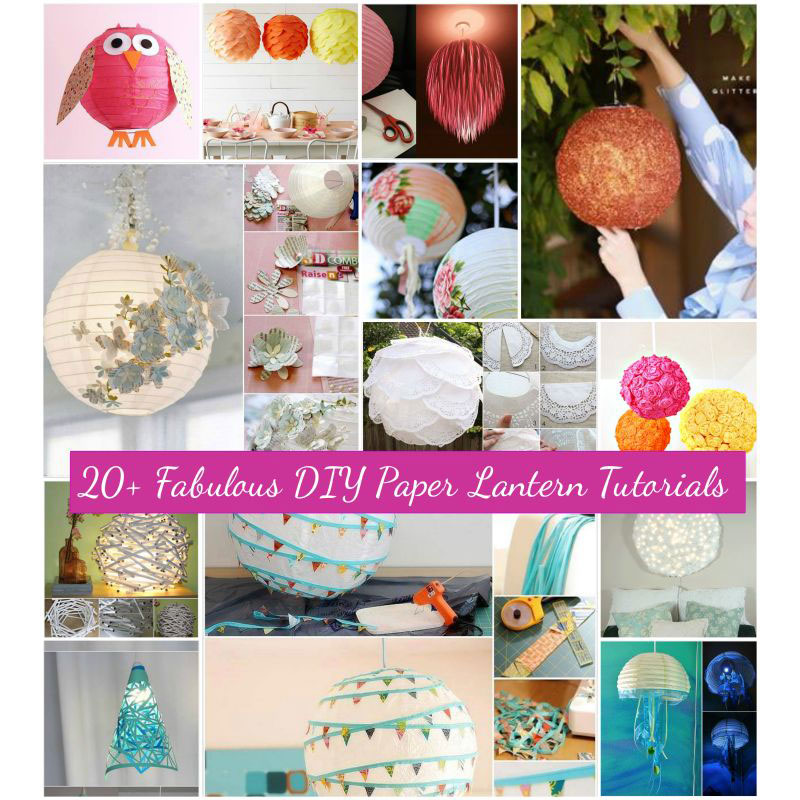
To complete the glampsite, we decorate! Lighting is everything, and my favorite part is the six amazing lanterns the kids made using cupcake liners, paper doilies, and tissue paper. We added lights that change color by remote, and one of their favorite things to do is to lay in bed and change their lanterns.
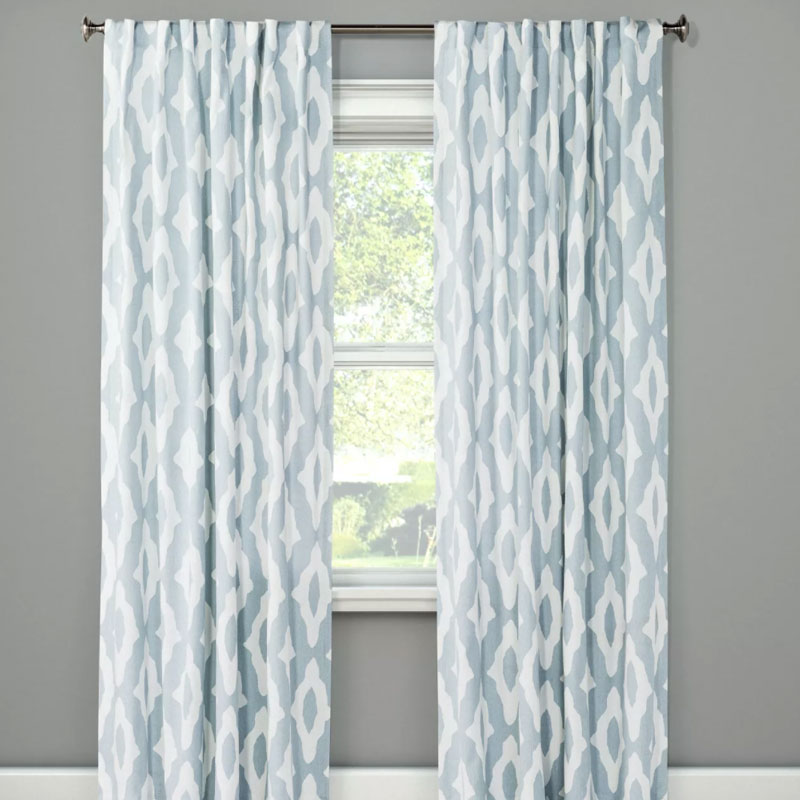
For added ambiance I glamped up the “living room” and master bedroom with small acrylic chandeliers, and placed battery-operated candles throughout the tent. One of the more challenging, but impactful, things I did was add curtain panels behind the master bed. Not only does it bring a feel of romance to the room, but also adds a bit of insulation. They were tricky to hang, but lighted rope did the trick and added a soft glow around the bedroom.
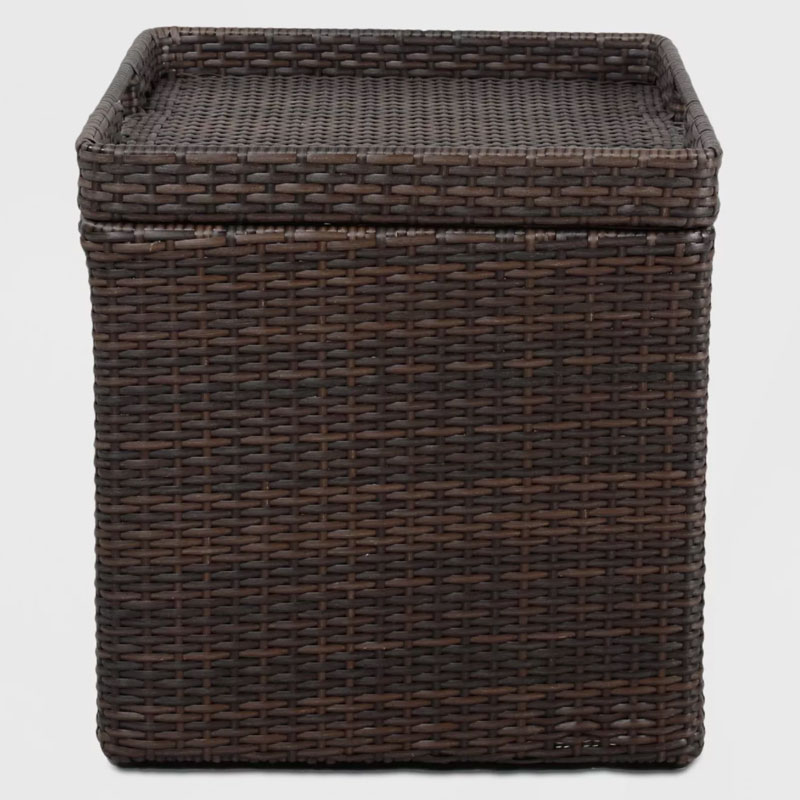
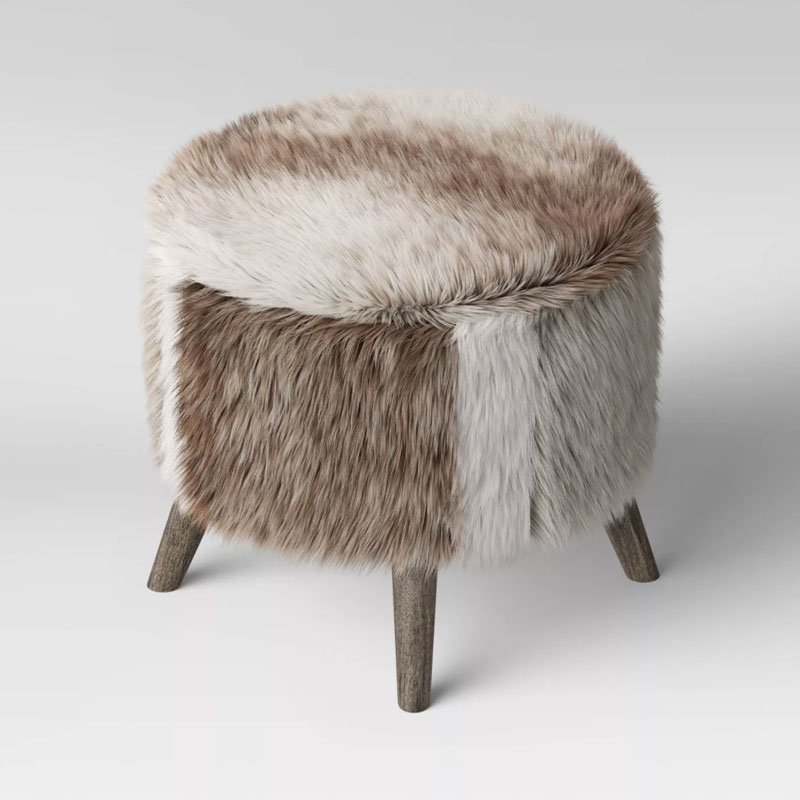
For storage, I purchased storage ottomans that double as coffee tables, and wicker baskets to hold shoes, hats, toys and more. On the front porch, we have a couple of chairs and side tables, flowerpots, and string lights on the perimeter of the tent for a full glamping effect.
Movie Time
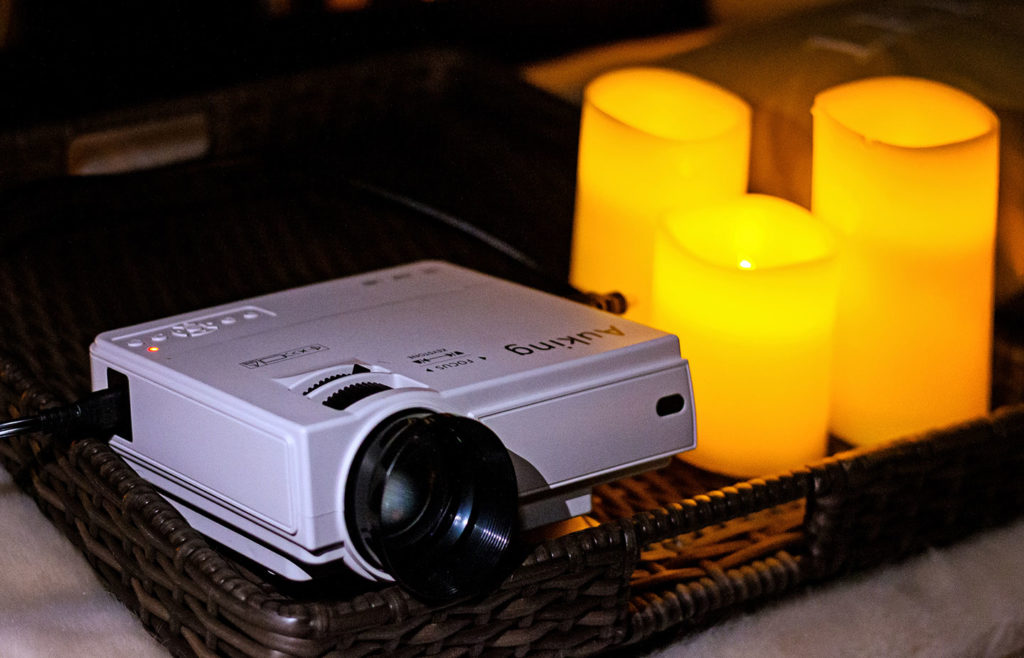
I wanted to make a special call out about how amazing it’s been to watch movies together in our tent! Each room has a wall divider, which also happens to be a perfect movie screen to use with a projector. The kids lay in their beds and we lay in ours and we can watch from both sides – even if it is Moana for the one hundredth time – “tent night”, synonymous with “movie night,” has become the most exciting night of the week!
Summer Under the Stars
All in all, backyard glamping been a great experience for our whole family – from planning to set up to enjoying our new space. I’m grateful to have this outdoor experience with my family and know the memories will last a lifetime. Even my husband loves it and said the smiles on the kids’ faces is well worth the effort. His biggest concern is “what’s next?” “Are we in for luxury bird-watching? Glamorous tail-gating? (Wait, that sounds pretty good!),” he said.


Backyard Glamping Checklist
Here are some PoshFavorites to help you create your own backyard glamping site.
Note: items were available at time of blog post, but availability may change over time.


About the Author
Jennie Korth is the Co-Founder and Chief Experience Officer for Poshabodes, which specializes in luxury home sharing and management. She is now also a backyard glamping expert. You can reach Jennie at jkorth@poshabodes.com.